setup-profile
Setting up user profile in StackBill CMP

- After entering the portal, you will see the My Profile option, where you can edit your information and upload the images according to your organization's images.

User credit limit (a limit that the admin allocates to the user to use the resource) - in this option, the user can view their admin-allocated credit limit.
Once every changes got completed, click the Save Changes button.
Change password for User Account in StackBill Portal
- To change your account password, click on the Change Password option located under My Profile.
- Password change menu apperas on the screen.
- To change your account password, click on the Change Password option placed under My Profile.

- Now Change Password menu appears on the screen.
- Enter the Old Password and then enter the New Password and confirm it.
- Then, Click on the Update button.
- Now the New Password has been updated successfully.
Choose your Payment Method in User Account
- To Select your payment, click on the Payment setting option placed under the Change Password option.

Payment settings menu apperas on the screen.
Select the required payment gateways
It is possible to integrate the user's own country's payment gateway into the StackBill CloudStack Billing Portal, but this should be communicated to StackBill Admin beforehand.
The image above is used from the demo version of the user portal, which is integrated with two payment gateways that have been integrated by the admin.
Credits & Promocode for User in StackBill CMP
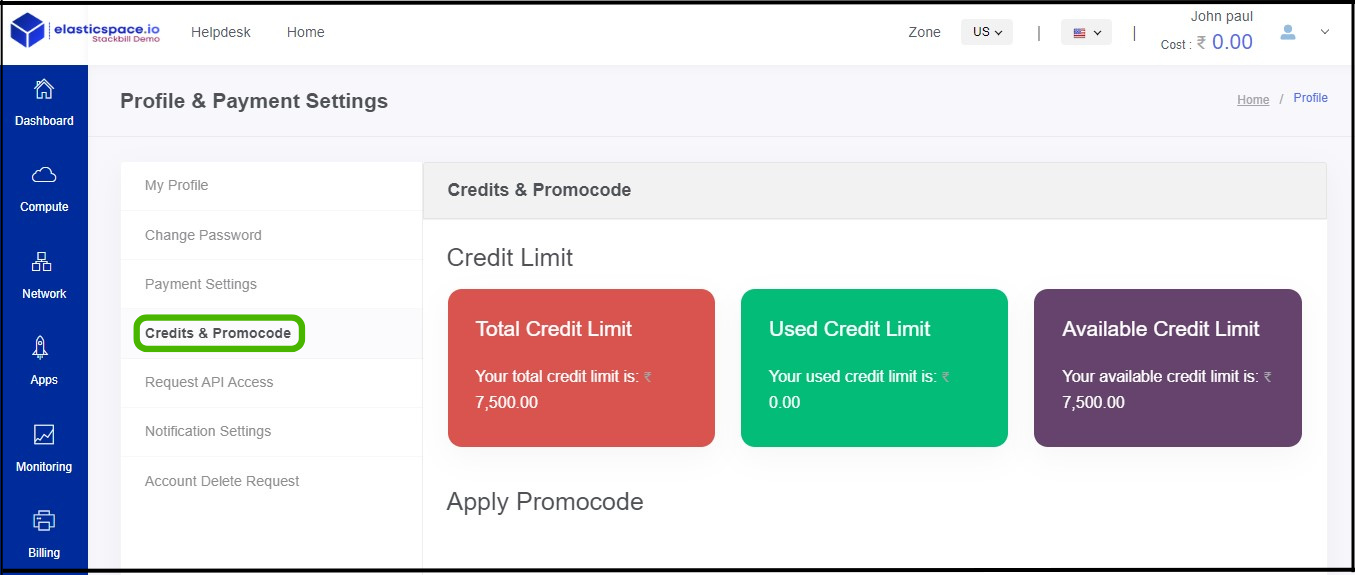
- Under the Payment setting option, click on Credits & Promo codes to check your credit limits and offers.
- Now the Credits & Promo code option appears on the screen.

- Total Credit Limit will display the number of credits available for the user.
- Under the Used Credit Limit, the user can view their used credit limit.
- Balance Available Credit Limit will display the available credit limits.
API Access Settings in StackBill CMP
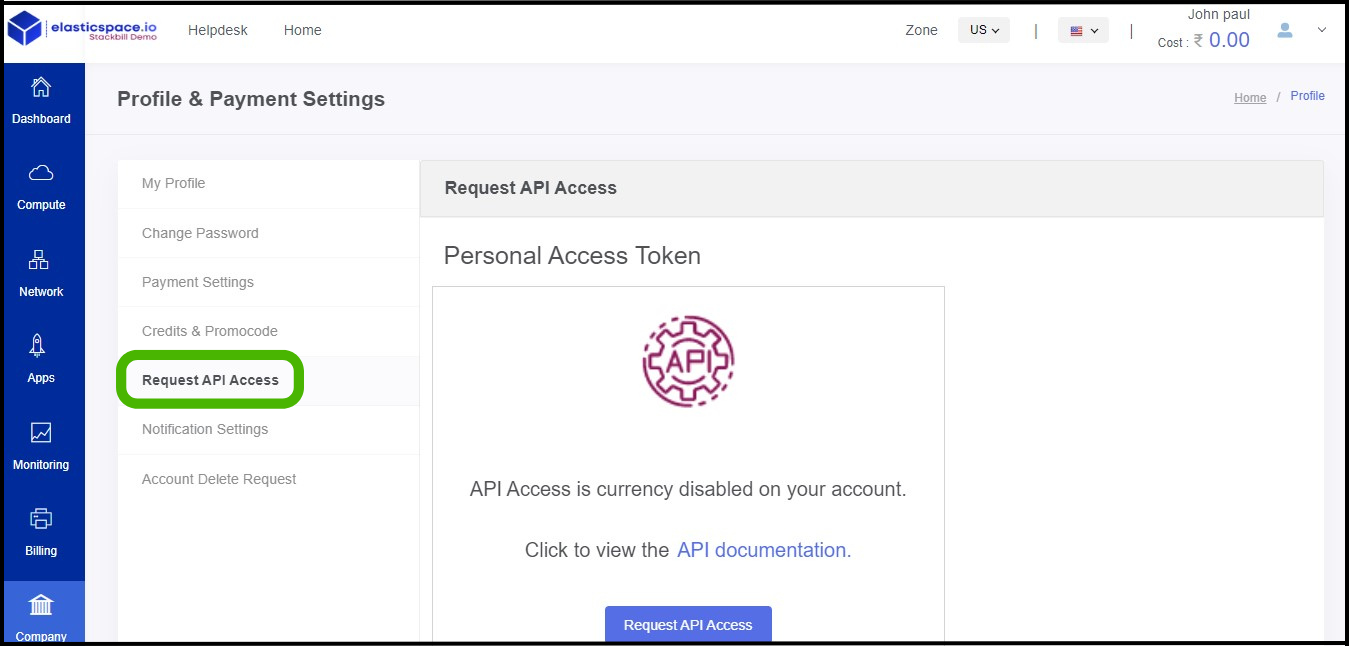
- Under the Credit & Promocode, click on Request API Access option to access API setting.
- Now API Access option appears on the screen.

- StackBill API allows you to manage your Instances and other resources programmatically using conventional HTTP request.
- StackBill's API allows you to perform any action you can perform through the Control Panel (except creating personal access tokens).
Notification Settings in StackBill CMP
- Under the Manage API Access, click on Notification Settings option to set notification alerts.
- Now Notification Settings option appears on the screen.

- Maintenance and outage notification - To receive notifications about outages and maintenance, the user can enable the Outage and maintenance notification option.
- Invoice Prefrence - When the invoice reminder option is enabled, the user will receive a notification about the bill payment before three days at the end of the month.
- Payments Overdue - By enabling the Payment overdue option, users can receive notifications regarding overdue payments.
The process of removing an account from the StackBill CMP
Under the Notification settings, click on Access Delete Request option to delete account from the portal.
Now Account delete request screen appears.

- Kindly follow the procedure to delete your account from StackBill.
About StackBill
StackBill is a complete self-service intuitive Cloud Management Portal with extensive features leveraging Apache CloudStack® with state of art years of expertise.