Creating New Network
Network Manager in StackBill CMP
StackBill provides private networking, traffic filtering, and load balancing so you can secure and control your application traffic.
StackBill provides private networking, traffic filtering, and load balancing so you can secure and control your application traffic.
- There are two types of network available in StackBill CMP they are L2 network, and Isolated network.
L2 Network on Stackbill Cloud Management portal.
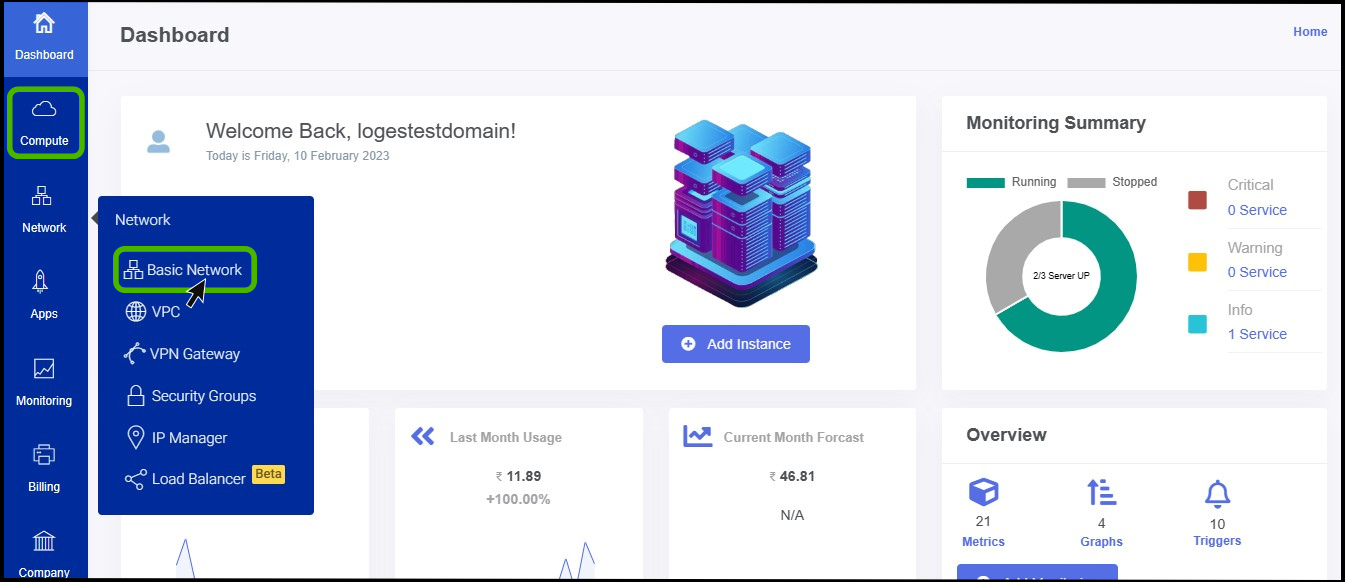
- Click on the Network dropdown button below the virtual resources icon, Which is available in the top left corner. from the dropdown, Click on Basic Network, to create a new network.
- Basic Network screen appears.
- At the right side of the panel the user can able to see a option called ADD NETWORK, Click on it.
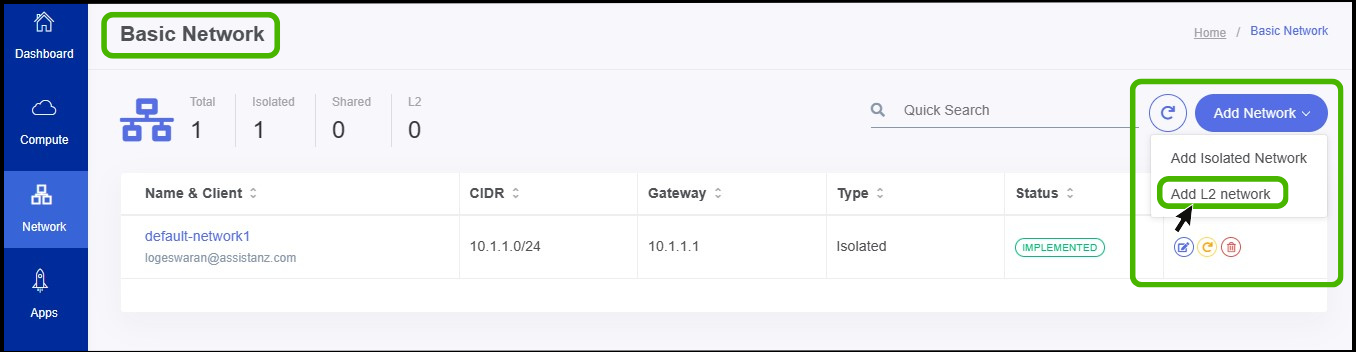
- So once You click on the Add network button select the required network type as per the need.
The following document shows the flow of the L2 network.
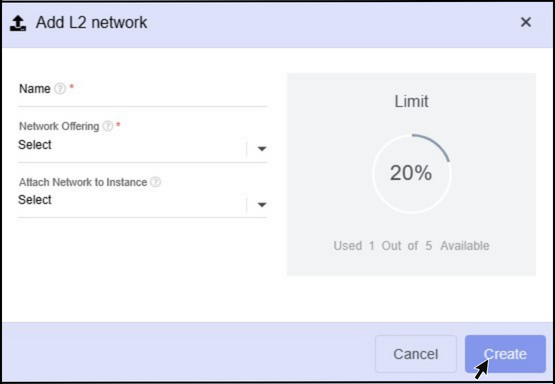
Name - Specify a name for the network.
Network offering - Select the Network offering.
Attach Network to Instance - The user can attach the network to their required instance using this option.
Finally,Click on the Create button.
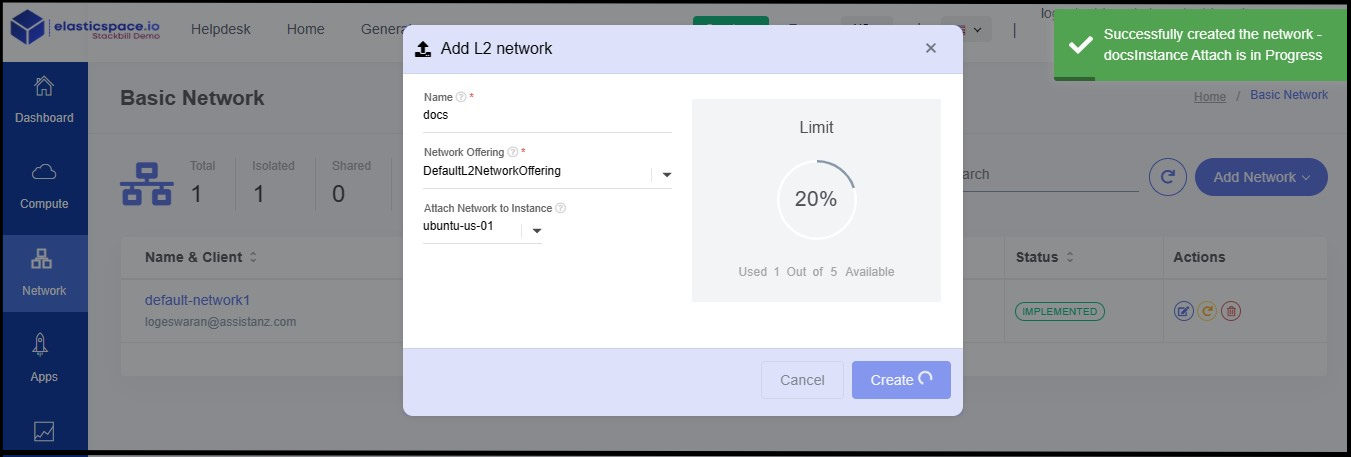
- Now the L2 Network has been created successfully.
Creating Isolated Network in StackBill CMP
- Click on the Network dropdown button below the virtual resources icon, Which is available in the top left corner. from the dropdown, Click on Basic Network, to create a new network.
- Basic Network screen appears.
- At the right side of the panel the user can able to see a option called ADD NETWORK, Click on it.
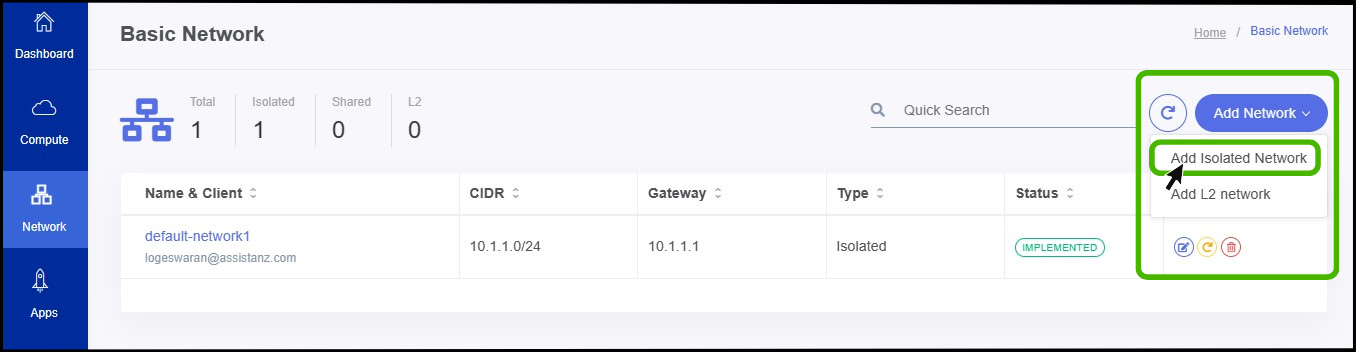
- Once You click on the Add network button select isolated network option to create a isolated network.
The following document shows the flow of the Isolated network.
Name - Specify a name for the network.
Network offering - Select the Network offering.
Attach Network to Instance - The user can attach the network to their required instance using this option.
Finally,Click on the Create button.
- Now the Isolated Network has been created successfully.