Autoscaling
Overview of Autoscaling feature in Stackbill Cloud Management Portal.
On top of virtualized hardware, StackBill Instances are Linux-based virtual machines (VMs). Each instance you make is a separate server that you may use on its own or as part of a larger cloud-based system.
Autoscaling allows servers to go to sleep during times of low load, saving on electricity costs for companies running their server infrastructure.
Add Autoscaling feature to the instance in Stackbill CMP
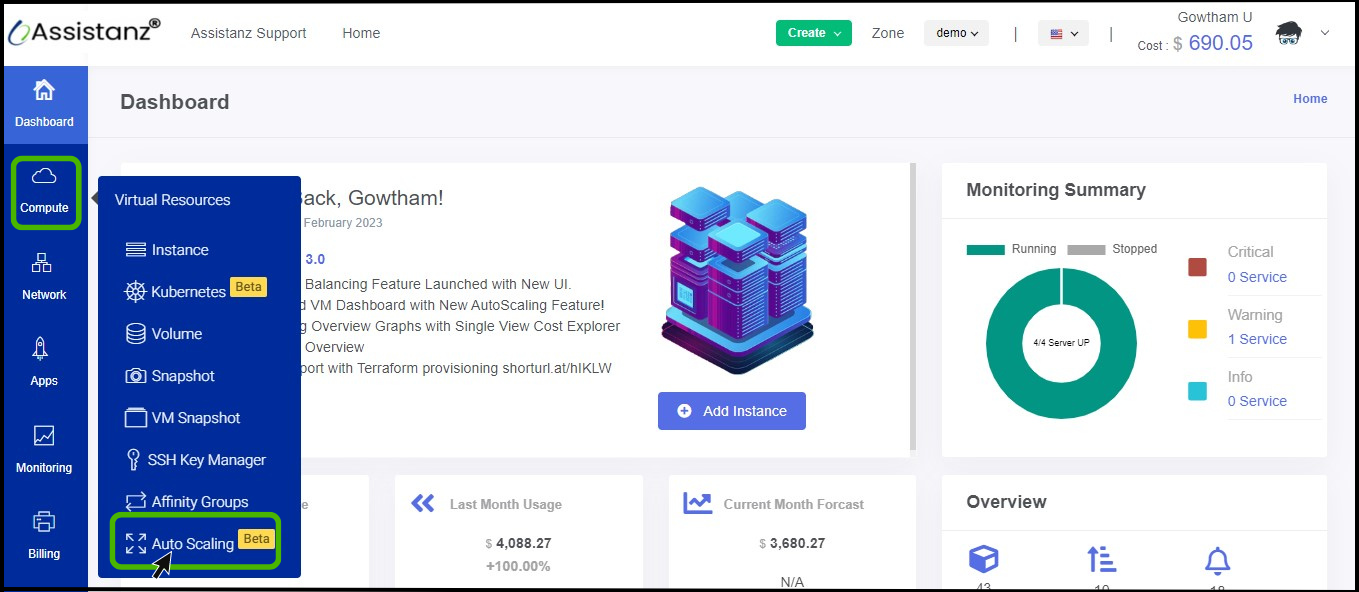
- Click on the Virtual Resources dropdown button below the dashboard icon, Which is available in the top left corner. from the dropdown, Click on Autoscaling, to create a Autoscaling policy.
- Autoscaling screen appears.
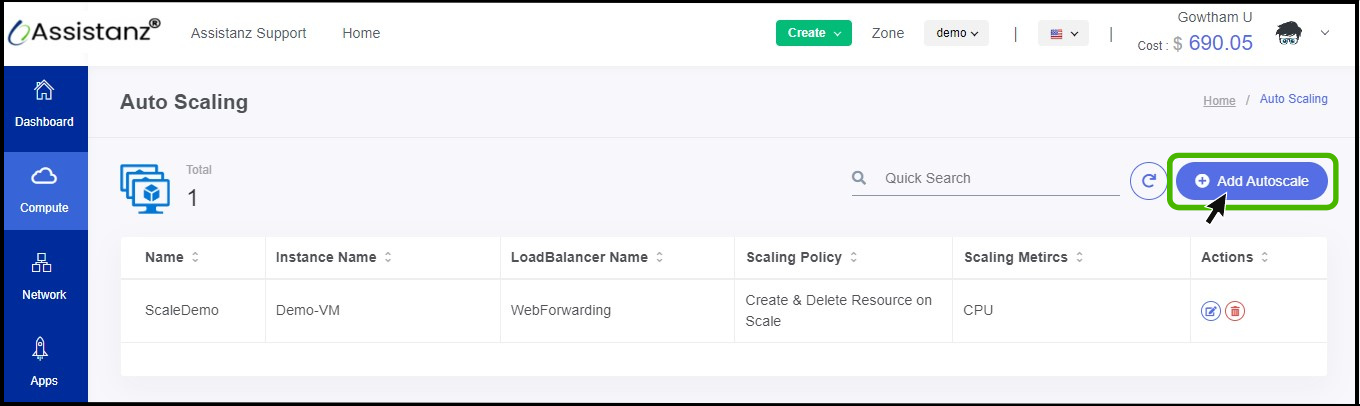
- On the right side of the panel you can see a option called Add Autoscale option, Click on it.
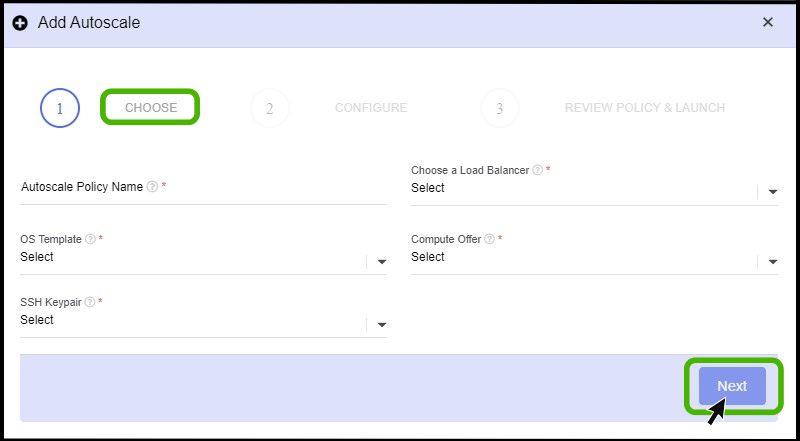
- Add Autoscale option appears.
- Auto scale Policy Name - Give a name for the policy.
- Choose a Load balancer - Identify the load balancer for which the Auto Scale policy should be created.
- OS Template - Select the OS template.
- Compute Offer - Choose the Compute offer as per the requirement.
- SSH Keypair - Select the SSH Keypair.
- Click Next button.

- On the second step complete the configuration process for the Autoscale policy.
- Scaling Policy - Select the Scaling policy as per the requirement.
- Capacity planner - In the capacity planner, you can specify how many minimum and maximum instances you want to create while scaling up.
- Scale-up - The scale-up is based on two metrics (i.e) CPU, and MEMORY, select the metrics as per the requirement.
- Scale down - The scale down also is based on the same metrics.
- Threshold - Here, you can specify a specific threshold value to launch auto-scaling so that the instance will be created Virtually when the VM reaches threshold value)
- Warmup interval - When creating a new capacity provider or updating an existing one, you can specify a custom instance warm-up time, and you can set instance warm-up time in seconds.
- And click the NEXT button.
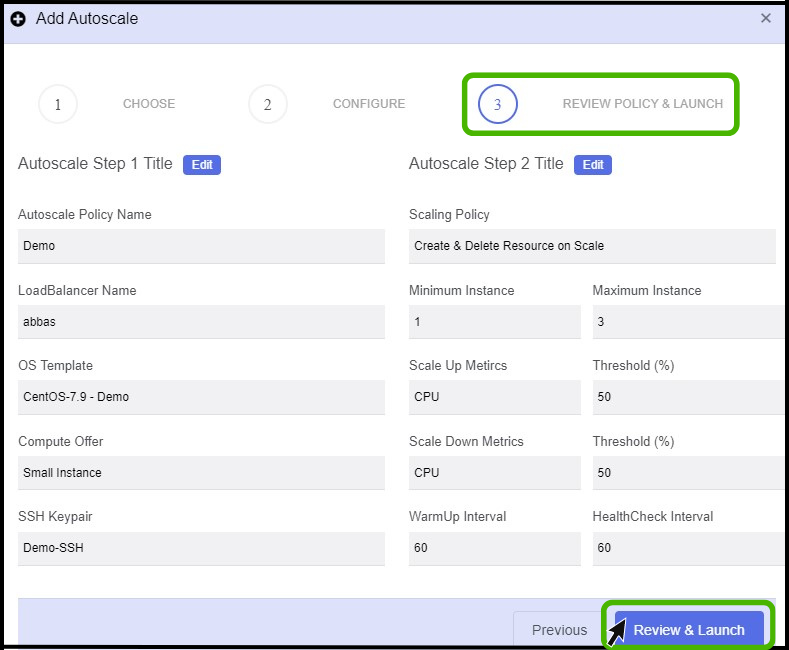
- In this section, you can review your policy in detail.
- If you want to edit the previous page you can edit using the Edit option which is placed above the page.
- Click Review and launch button to launch the policy.
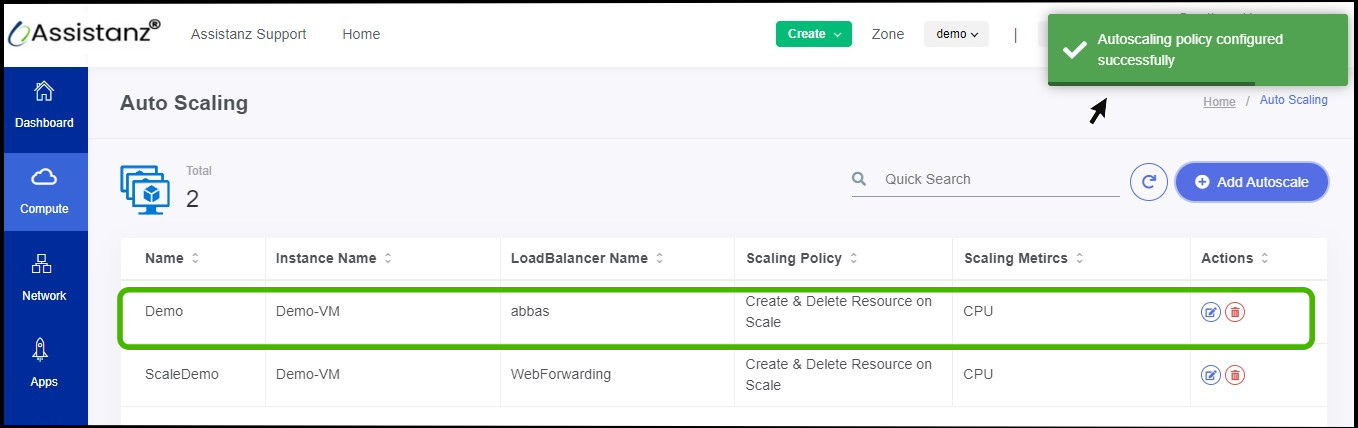
- Now the Autoscaling policy has been configured successfully.