Enabling Saving Plan
Saving Plan in StackBill Cloud Management portal
Savings Plans in StackBill are a flexible pricing model that offer low prices on resource usage, in exchange for a commitment to a consistent amount of usage (measured in ₹ /hour) for long term.
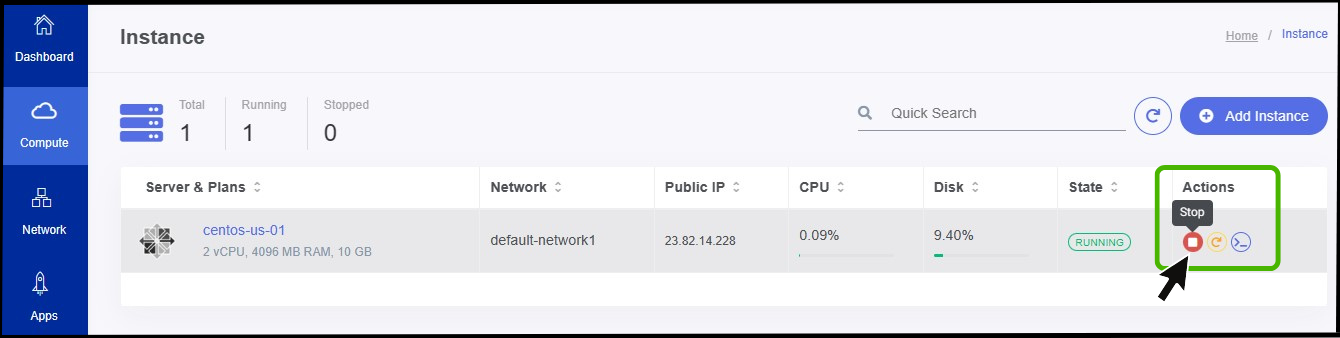
- Before enabling a saving plan ensure the instance is stopped.
The user can enable saving plans in StackBill CMP in two ways they are,
- Enable the plan directly by clicking on the instance, which may automatically generate the instance information process.
- Second, by enabling using the savings plan.
- Enable the plan directly by clicking on the instance
Enable the saving plan directly by clicking on the instance.
- Step 1
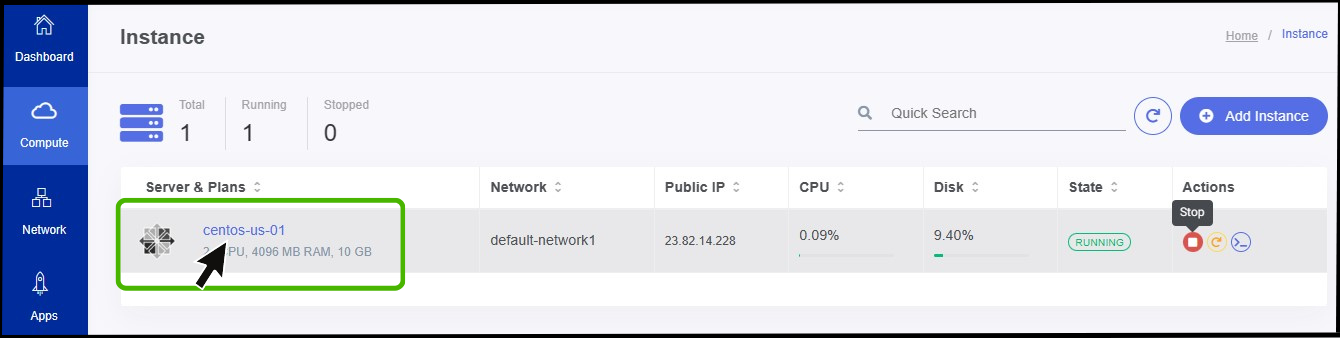
- Click on the instance.
- Select Resize from the option.
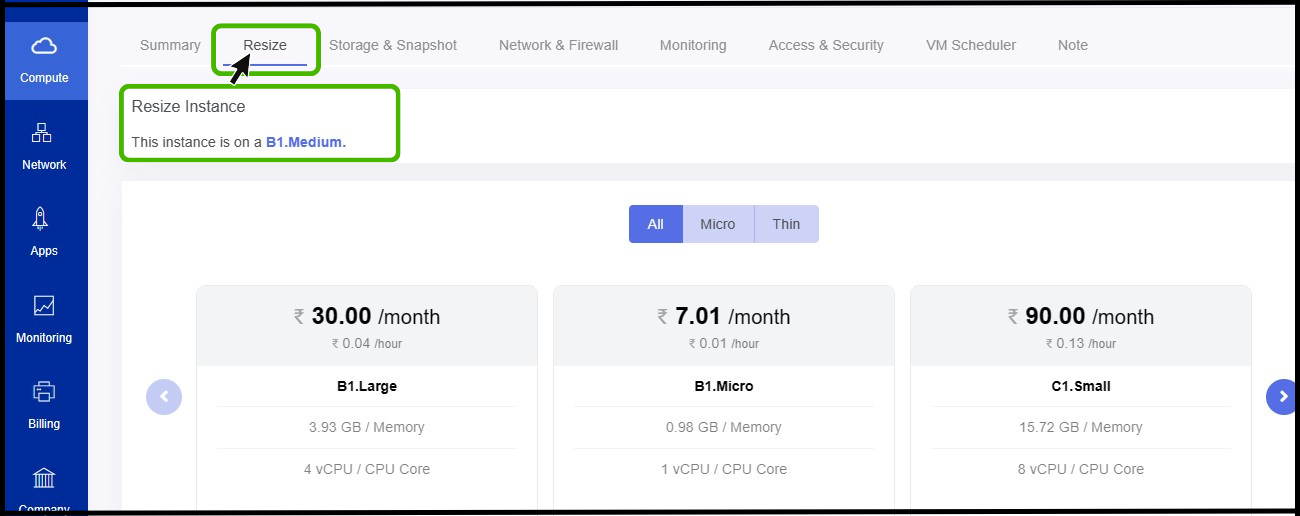
- When you scroll down on the panel, you will see an option called Purchase Saving plan.
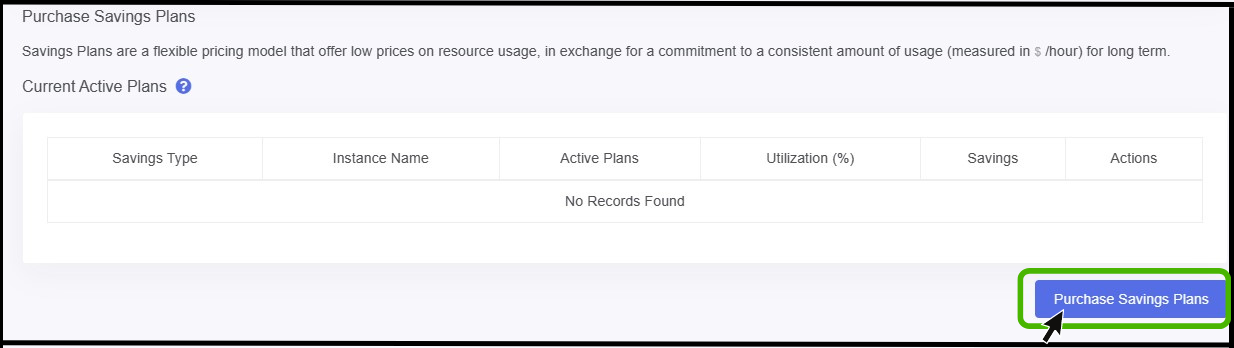
- On clicking the Purchase Saving Plan button, the page for Purchase Saving Plan is appear on the screen.
- Here you can select the offering as per the requirement.

Reserved offering type - There are two types of reserved offering they are STANDARD and CONVERTABLE.
STANDARD OFFERING - Users who select the standard offering cannot upgrade or downgrade the offering; they can only maintain the same offering they configured initially.
CONVERTABLE OFFERING - If users select the convertible offering, they can upgrade or downgrade the offering at any time.
RI Plan name
- Select the RI plan (i.e. yearly or monthly coverage).
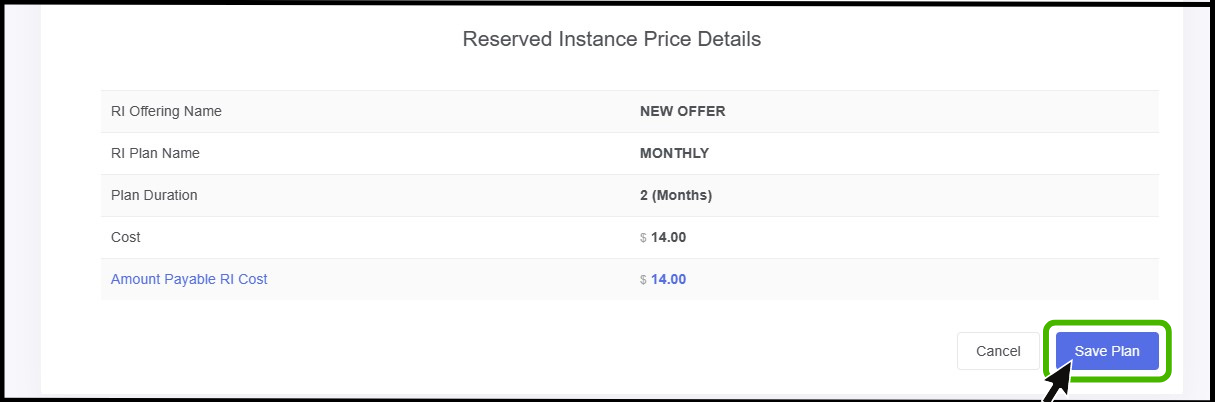
- Finally Click on the SAVE PLAN option.

- Now the Reserved offering is successfully configured.
Configure saving plan offering using the configuring saving plan option.
Step 2
Now we will configure saving plan offering using the second method as configuring saving plan option.
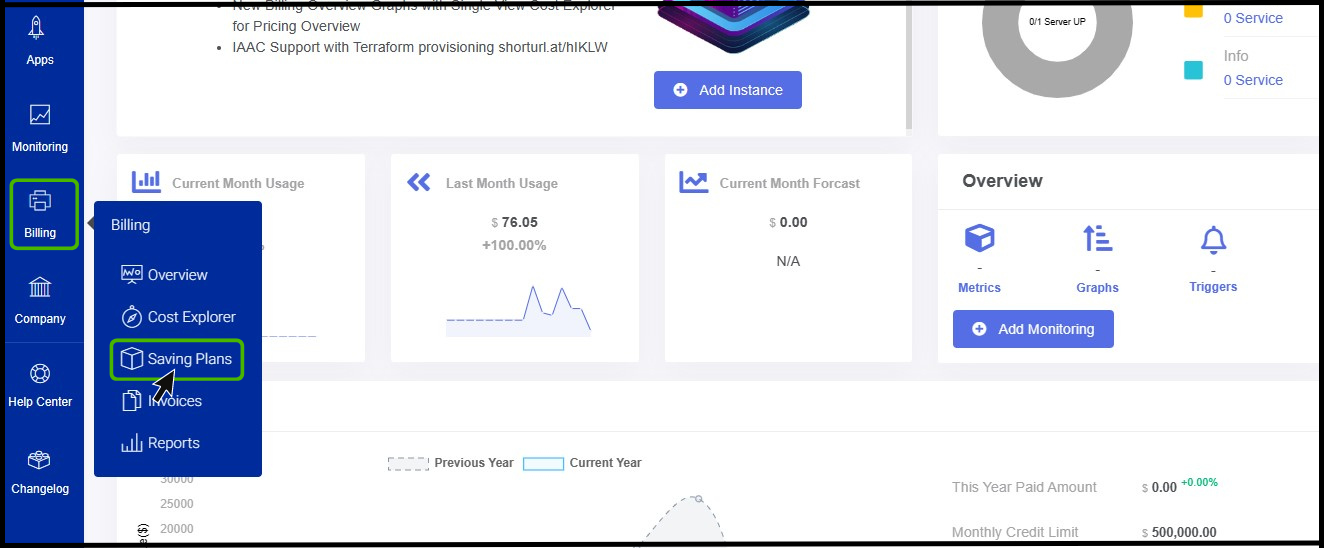
The billing option can be found on the left side of the panel.
Click on it to view the drop-down menu.
From the drop-up select the Savings plan.
- Saving Plan screen appears on the screen.

- Active plan - Here you can see how many Reserved plans are in active.
- Savings - Using the reserved instance policy, you will be able to see how much amount has been saved by offering saving plan.
- Plans expire this month - In this section, you can see the plans that going to expire this month.
- Current Active Plans - This section shows the Current Active Plan and necessary details.
- At the bottom of the page you can able to see an option called Purchase Saving Plan.
- Click on it to Purchase a Saving plan for your resource.

- Purchase a Saving plan screen appears.
- Here you can choose the offering as per the requirement.
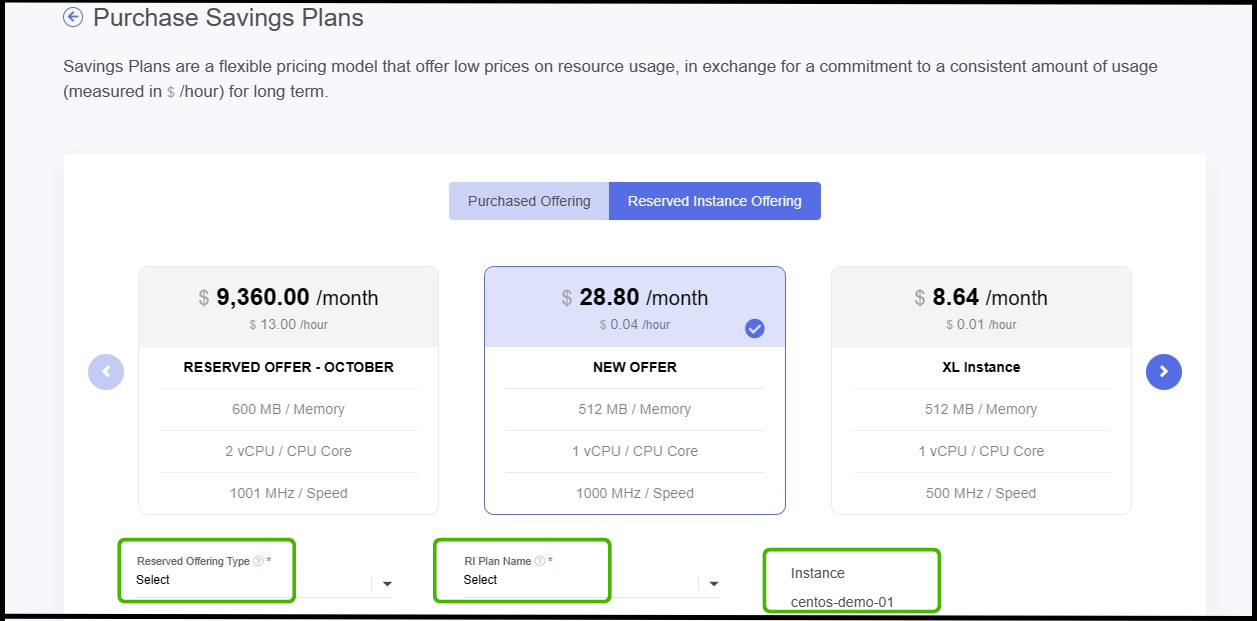
Reserved offering type - There are two types of reserved offering they are STANDARD and CONVERTABLE.
STANDARD OFFERING - Users who select the standard offering cannot upgrade or downgrade the offering; they can only maintain the same offering they configured initially.
CONVERTABLE OFFERING - If users select the convertible offering, they can upgrade or downgrade the offering at any time.
RI Plan name
- Select the RI plan (i.e. yearly or monthly coverage).
Instance
- In this case, the user wants to select the VM on which a saving plan will be configured.
- Finally Click on the SAVE PLAN option.
- Now the Reserved offering is successfully configured.