Reinstalling Instance in Stackbill
Stackbill's instance can be reinstalled by following the procedures below.
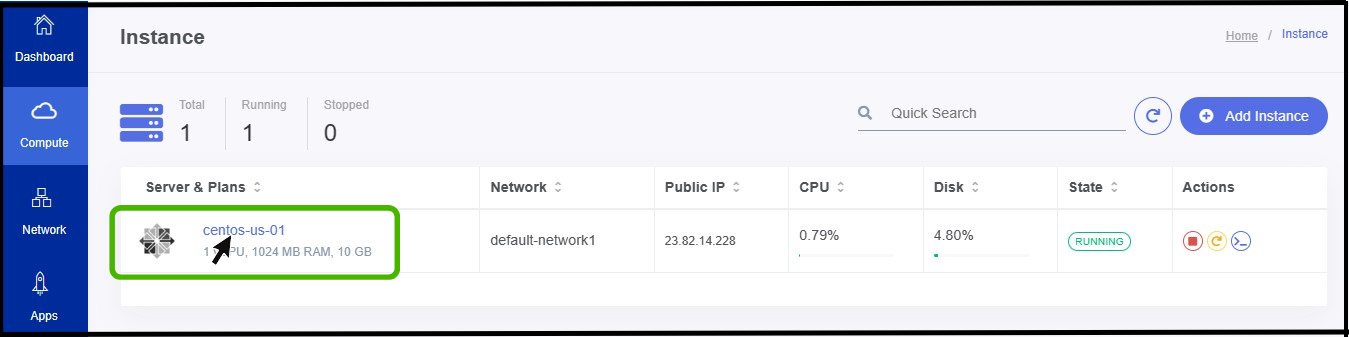
- Step 1 - Click on the Compute option from the side menu of the portal and select Instance.

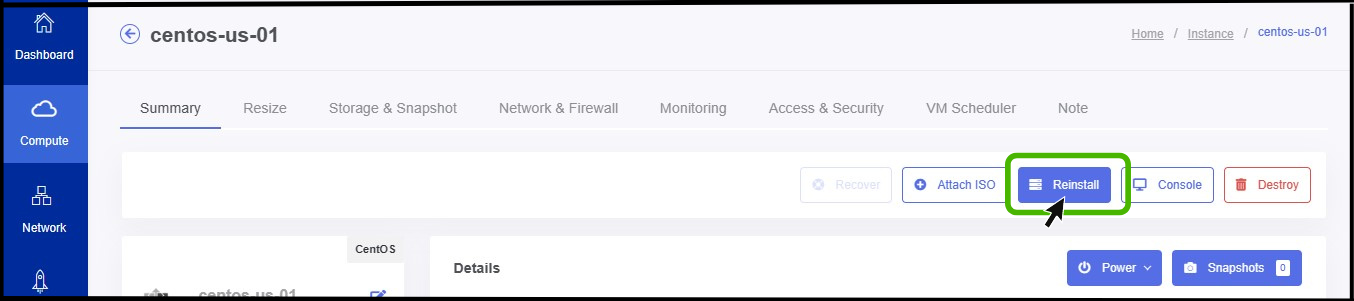
- Step 2 - Click on the Instance so that you can view a summary page of the particular instance.
- Step3 - There you can view the Reinstall icon at right side of the panel, Click on it.
- Now the Reinstall option appears on the screen.
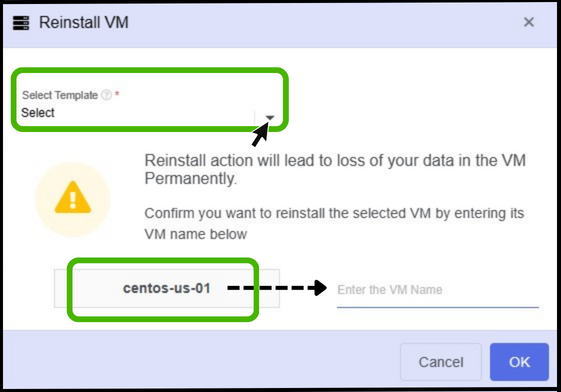
- Select Instance - In this step, the user must select the OS image that will be created after the reinstallation is finished.
- Enter the VM name - Here the user needs to enter the name of the instance to install.
- Finally click OK button.
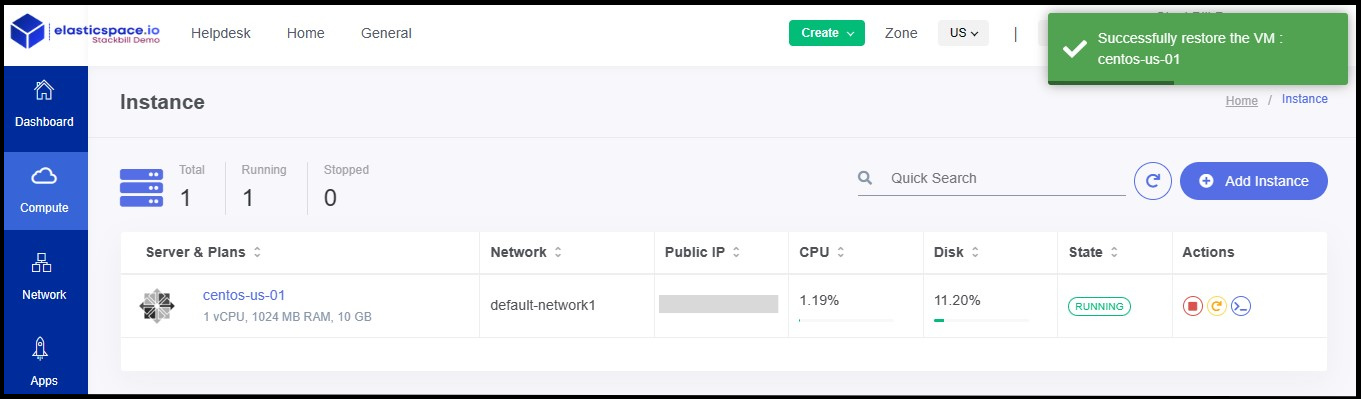
- Now the instance has been reinstalled successfully.